Casement windows are a popular choice for many homes, but over time, their sashes can wear out. Instead of replacing the entire window, replacing just the sash can save you time and money.
In this post, we’ll walk you through the process of sash replacement, the tools you’ll need, and why it’s a cost-effective solution for maintaining your windows.
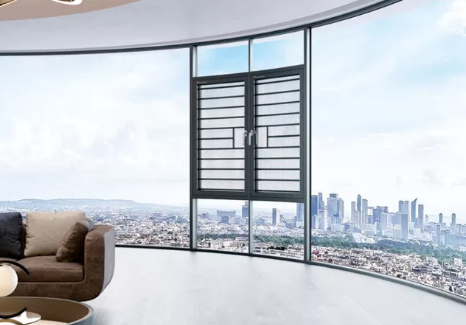
What is a Casement Window Sash?
A casement window sash is the movable part of the window that opens and closes. It’s usually hinged on the side, allowing the window to swing open like a door. The sash is an essential component in the function of a casement window, providing both accessibility and ventilation.

Importance of the Sash in Casement Windows
The sash plays a crucial role in the overall performance of casement windows. It ensures smooth operation when opening and closing the window. Without a properly functioning sash, the window may not seal correctly or may become difficult to operate. Replacing a damaged or worn-out sash is often more cost-effective than replacing the entire window, and it can improve both the window’s function and your home’s energy efficiency.
Why Replace the Sash on a Casement Window?
Replacing the sash on a casement window is a practical solution for a variety of reasons. Over time, the sash can experience wear and tear, affecting both its appearance and functionality. Cracks, warping, or a loose seal can lead to drafts and reduce energy efficiency.
Reasons for Sash Replacement
Wear and Tear: Constant use of the window can cause the sash to degrade, making it harder to operate. Over time, hinges and seals may become worn out, causing the window to open or close improperly.
Aesthetics: A damaged or old sash can negatively impact the overall look of your window and home. Replacing the sash gives the window a fresh appearance, boosting your home’s curb appeal.
Energy Efficiency: When the sash is worn, it might not seal tightly. This can lead to drafts, letting in outside air and causing your heating or cooling system to work harder. A new sash will ensure a better seal, improving energy efficiency and lowering utility bills.
Advantages of Replacing Just the Sash
Cost-Effective: Replacing the sash is much cheaper than replacing the entire window. You get all the benefits of a new window without the added cost of a full replacement.
Less Disruption: The sash replacement process is quicker and less disruptive than replacing the whole window. You won’t have to deal with a big construction project or long installation times.
Retain the Frame: If the window frame is in good condition, replacing just the sash allows you to preserve the existing frame, saving both time and money.
Step-by-Step Guide to Replacing a Casement Window Sash
Unlike installing a casement window, replacing a casement window sash can seem like a big task, but with the right steps, it's manageable. Here’s a simple guide to walk you through it.
Opening the Window and Exposing the Hinges
First, fully open the casement window. This gives you easy access to the hinges. Make sure the window is securely open before you begin working. You don’t want it to accidentally close while you’re removing the sash.
Disconnecting the Hinges and Removing the Old Sash
Next, locate the hinge clips. These are usually found on both the top and bottom of the window sash. Use a flathead screwdriver to release these clips. Once the clips are free, carefully remove the sash from the window frame. It may be a little tricky, but gently lift the sash out of place. Keep an eye on any loose parts, like the window operator arm, as you remove the sash.
Transferring Hardware from the Old Sash
Inspect the old sash for any hardware you’ll need to transfer, such as hinges, operators, or locks. Carefully remove these parts, checking if they are still in good condition. Make sure the old hardware is compatible with the new sash. If it’s worn or damaged, you may need to replace it.
Installing the New Sash
Take the new sash and position it into the window frame. Align it carefully with the hinge arms. Once aligned, attach the hinge arms to the new sash, making sure everything fits snugly and properly. It’s essential to double-check the alignment before securing the parts in place.
Reconnecting Hinges and Testing the Window
Now, reconnect the hinge arms to the sash. Once they’re attached, test the window’s operation. Open and close the window to ensure the sash operates smoothly. Check if it seals tightly against the frame, preventing drafts. If everything works well, your new sash is securely in place!
Common Issues When Replacing a Casement Window Sash
Replacing a casement window sash is a fairly straightforward task, but there are some common issues you may run into during the process. Here are a few things to watch out for.
Weatherstripping Fitting Too Tight at First, but Relaxing Over Time
When you install a new sash, the weatherstripping might fit tightly at first. This is normal and shouldn’t be a cause for concern. New weatherstripping is typically more rigid and will feel stiff when you first close the window. Over time, the material will relax and mold to the window frame, providing a better seal. Give it a few weeks, and the tightness should ease, allowing for smoother operation.
Trouble with Hinge Alignment or Misfitting Sash
If the sash isn’t properly aligned with the hinge arms, it may not open or close as smoothly as it should. Be sure to align the sash carefully when installing it. Even a slight misalignment can cause problems with the window’s function, so take your time to ensure everything fits correctly. If you notice the sash doesn’t fit snugly, check the hinges for any damage or wear.
Difficulty Removing an Old Sash That Is Deteriorated
Older sashes, especially those that have deteriorated over time, can be tough to remove. They may be stuck due to paint build-up, weatherstripping, or simply because they’ve warped. Use a stiff putty knife to gently loosen the sash, but be patient. If the sash is severely deteriorated, it might require a little extra effort to remove without damaging the frame.
Weatherstripping and Its Role in Sash Replacement
When replacing the sash on a casement window, you’ll likely encounter new weatherstripping. While this material plays a critical role in the window’s seal, it can present some challenges during installation.
How New Weatherstripping May Fit Tightly at First but Will Loosen After a Few Months
New weatherstripping may feel stiff and tight when first installed. This is normal. The material hasn’t yet settled into place and might seem a bit rigid or hard to compress. Over the next few months, as the weatherstripping is exposed to temperature changes, it will naturally relax and mold itself to the window frame. As it does, you’ll notice a better seal forming, ensuring a tighter fit over time.
The Importance of Weatherstripping in Creating an Energy-Efficient Seal
Weatherstripping plays a vital role in ensuring your window is energy-efficient. It helps prevent air from leaking in or out, keeping your home’s temperature stable. Without it, drafts can enter, leading to higher energy bills as your heating and cooling systems work harder. A properly installed and sealed sash, along with effective weatherstripping, significantly improves your window’s performance and helps keep your energy costs down.
Maintenance Tips for Your New Sash Window
Taking care of your new sash window is key to ensuring it lasts for years. Regular maintenance will keep it working smoothly and looking great. Here are some tips to help you maintain your window.
Regular Cleaning and Maintenance to Extend the Life of Your Sash Window
Clean your sash window regularly to prevent dirt, dust, and grime from building up. Use a soft cloth and mild detergent to wipe down the frame and sash. Avoid abrasive cleaners that can scratch the surface. Pay special attention to the window tracks to prevent debris from interfering with smooth operation. Regular cleaning helps maintain the window’s appearance and function.
Lubricating Hinges and Checking for Signs of Wear
Hinges play a big role in the operation of your sash window. To keep them working properly, apply a lubricant like silicone spray or oil to the hinges once a year. This will help prevent them from rusting and reduce friction. While doing this, check for any signs of wear or damage to the hinges or other moving parts. If you notice anything unusual, consider replacing the worn parts before they cause bigger issues.
How to Care for Weatherstripping and Ensure It Stays Intact
Weatherstripping is crucial for keeping drafts out and improving energy efficiency. To keep it in good condition, clean the weatherstripping carefully, removing any dirt or buildup. If it starts to show signs of wear, replace it promptly. Also, check for any gaps or areas where it’s not sealing properly. Over time, weatherstripping can lose its effectiveness, so it’s essential to keep an eye on it and replace it when necessary.
Conclusion
Replacing the sash on a casement window is an affordable way to improve functionality and energy efficiency. It’s a simple DIY project that can save you money compared to full window replacement. However, if you're unsure or face challenges, professional help might be the best option.
FAQs
1. How do I know if I need to replace my casement window sash?
If your window sash is difficult to open or close, has visible cracks, or allows drafts, it may be time for a replacement. Check for worn-out weatherstripping or damaged hinges, which can affect window performance.
2. Can I replace the sash on a casement window myself?
Yes, replacing a casement window sash is a DIY-friendly task. You'll need basic tools like a flathead screwdriver, Phillips screwdriver, and a new sash. However, if you encounter alignment or hardware issues, professional help may be required.
3. Why does new weatherstripping feel tight initially?
New weatherstripping is often stiff at first. Over time, it will relax and mold to the window frame, providing a better seal and improving energy efficiency.
4. How can I maintain my new sash window?
Regularly clean your sash window, lubricate the hinges, and inspect the weatherstripping for wear. These steps will extend the life of your window and ensure smooth operation.
5. Should I hire a professional for sash replacement?
While sash replacement can be a DIY project, hiring a professional is a good idea if you’re unsure about alignment, hardware compatibility, or face difficulties during installation. Professionals ensure a proper fit and smooth operation.


